While watching on YouTube, we’d love to repeat the best part of the video to experience the excitement over and over again. Meanwhile, creating an infinite loop on YouTube videos is also a technique for content creators to make the audience laugh. Whatever your reasons are, YouTube and other tools offer several ways to loop videos, ensuring you can indulge in your favorite content or create an amusing atmosphere in the video.
Without further ado, let’s dive into the features and steps of the methods below.
Part 1. Can You Loop a YouTube Video?
The answer is a big, massive yes. You can loop a YouTube video using the built-in option. YouTube’s native features allow users to create loops effortlessly. Here’s a simple step-by-step guide:
Step 1. Open the YouTube Video
Navigate to the YouTube website and find the video you want to loop.
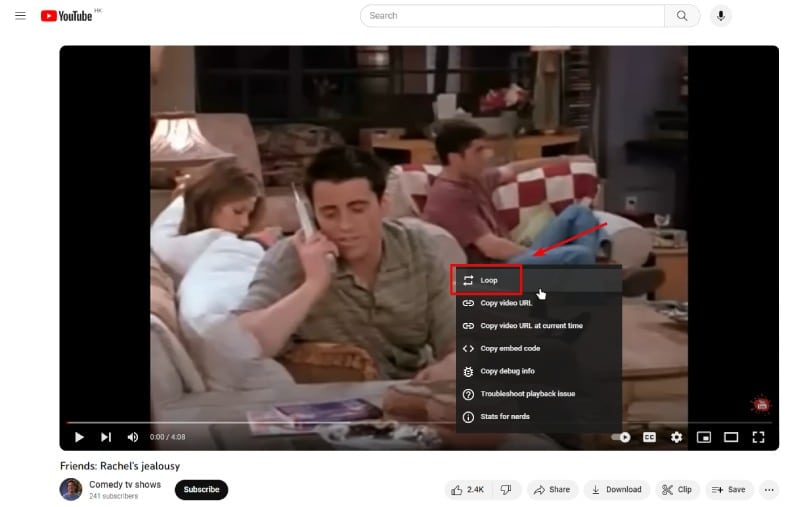
Step 2. Right-click on the Video
Right-click on the video to show more options.
Step 3. Select Loop from the Context Menu
In the context menu that appears after right-clicking, select Loop.
Step 4. Check for Loop Confirmation
Once you’ve selected the Loop option, you should see a confirmation or indication that the video is set to loop. This might include a loop icon on the video player.
Step 5. Play the Video
Click the Play button to start the video. The video will now loop continuously until you manually stop it.
Please note that YouTube features and interfaces can change, so if the Loop option is not available or if there are new features introduced, you might want to check YouTube’s help resources or community forums for the most up-to-date information.
Part 2. How to Loop a YouTube Video Before Uploading
Sometimes, you might want to loop a video before uploading it to YouTube. In such cases, third-party tools like ArkThinker Video Looper Online come in handy. This powerful looper, as its name indicates, is a web-based tool that offers free looping features plus wide support of various video formats. You can also change the video speed, change the video encoder, and the resolution of the video in it. What makes it stand out is its simplicity. When looping the video in this converter, no extra downloads are required, and there will be no watermark at all.
Here is a quick guide to loop your YouTube video before uploading:
Step 1. Go to ArkThinker’s official site. You can find the Video Looper tool under the Free Tools menu.
Step 2. Select the tool. Click the Strat Looping Video button to upload a video.
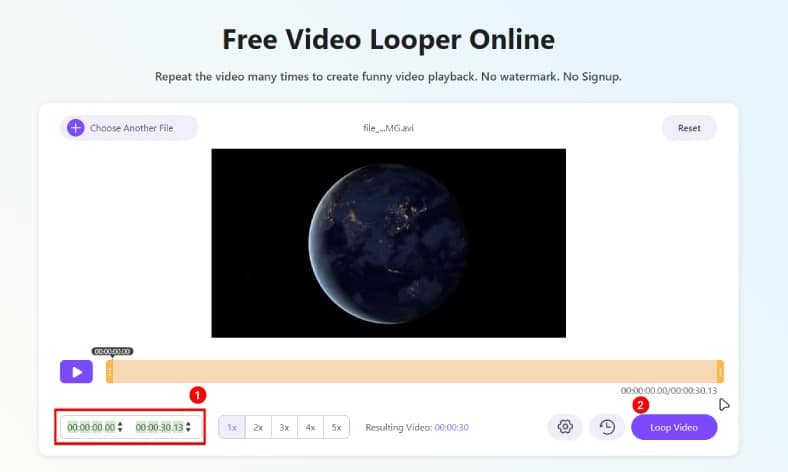
Step 3. You can loop a part of the video or the whole video by entering the start and end times.
Step 4. Click the Loop Video button to loop and export the video.
After looping, you can upload the video to YouTube with this funny effect.
Part 3. How to Loop a YouTube Video Online (During Playback)
As we move on, we find more ways of looping YouTube videos. This part concentrates on effortlessly looping videos during playback using online tools and browser extensions. Different from the previous parts, which offer the pre-upload and editing loop techniques, this section caters to those who prefer instant solutions while immersing themselves in their favorite content.
Tool 1. LoopTube
LoopTube streamlines the process of creating infinite loops for YouTube videos without requiring any downloads or installations. It’s ideal for users who prefer a straightforward online solution. The platform is designed to be accessible and user-friendly. Besides, users can create loops without the need for additional software downloads.
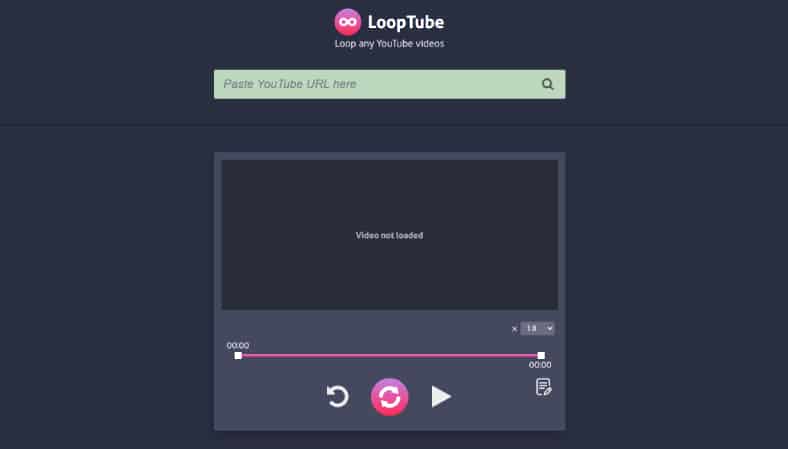
Step 1. Visit the LoopTube website. Paste Your YouTube Video URL
Step 3. Customize your looping experience by adjusting settings provided by LoopTube, ensuring personalized and engaging loops.
Step 4. With a single click on Loop, your YouTube will start to repeat playing as you prefer.
Tool 2. RepeatTube
RepeatTube provides an additional online solution for looping YouTube videos. It offers a simple and intuitive interface, making it easy for users to enjoy continuous video playback.
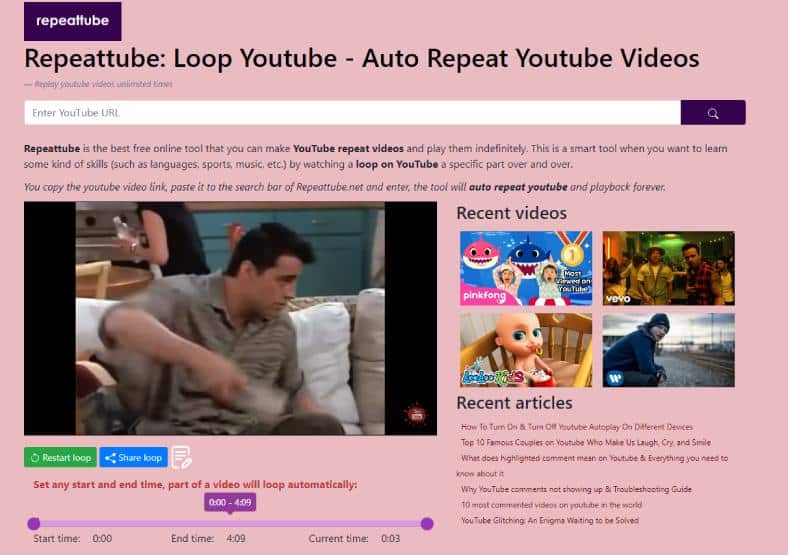
Step 1. Begin your looping by heading to the RepeatTube website.
Step 2. Input your desired YouTube video URL into it.
Step 3. You can choose to loop only a part of the video by entering a fixed time.
Step 4. Start the looping process with a click on Start, transforming your chosen video into an engaging loop.
Tool 3. Looper for YouTube
Looper for YouTube is a browser extension that seamlessly integrates into your browsing experience, offering customization options and the ability to loop specific portions of a video. Since it is integrated directly into your browser, you will get a cohesive experience. Meanwhile, it also offers the ability to loop specific parts of a YouTube video.
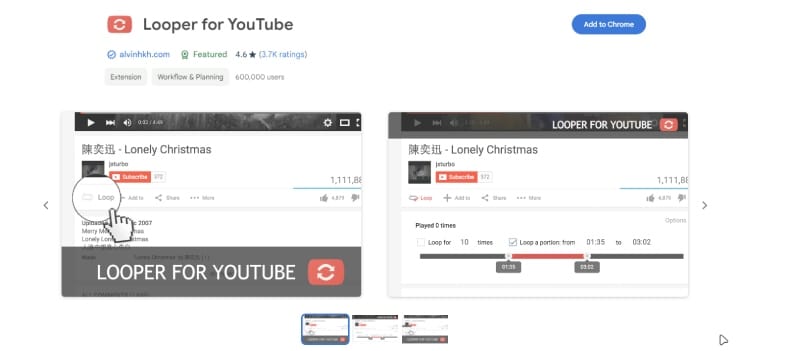
Step 1. Install Looper for YouTube Extension
Go to your browser’s extension store and install the Looper for YouTube extension.
Step 2. Open Your Desired YouTube Video
Navigate to the YouTube video you wish to loop. You will see a Loop option near the Share button.
Step 3. Click on the Looper Icon
Locate and click on the Looper icon that appears under the video after installation. There will be a bunch of customizations for you.
Step 4. Customize Loop Settings
Set up looping times and loop a portion from one point to another as you prefer. Your YouTube video will instantly start to loop.

Each tool caters to different user preferences, from the straightforward and quick loops of LoopTube to the more customizable and segment-specific looping provided by Looper for YouTube. Choose the tool that aligns with your specific needs and preferences for a seamless YouTube looping experience.
Conclusion
To put it in a nutshell, whether you want to loop a YouTube video on the platform before uploading or while watching online, there are multiple options available to suit your preferences. By learning these skills, you can enjoy your favorite content in an endless loop, immersing yourself in the captivating world of YouTube videos.
