Aesthetically appealing visuals are an essential component of the e-commerce realm. High-quality product photography gives potential consumers a clear, enticing view of products, elevating their perceived value. Understanding the product photography essentials will boost your engagement rates and improve your sales statistics.
This guide will equip you with the knowledge and tools to elevate your product photography game. We will specifically focus on the best product photography setup to make your items stand out in the crowded marketplace.
What Do I Need for Product Photography?
A camera is the photographer’s heart and soul. It defines the creative process and its result. Since the product should be represented flawlessly, consider investing in high-end equipment. Mirrorless and DSLR cameras are preferable, especially if they have interchangeable lenses. Macro lenses work to show the most delicate elements of small items. If your main subject is large, a wide-angle lens is essential to capture its immenseness and majesty.
Shaky hands can lead to blurry photos, detracting from the professional look. Additional tools, like a sturdy tripod and a remote shutter release, will streamline your product shooting process. These tools will let you recreate the same setup over and over again for different items to achieve a cohesive look.
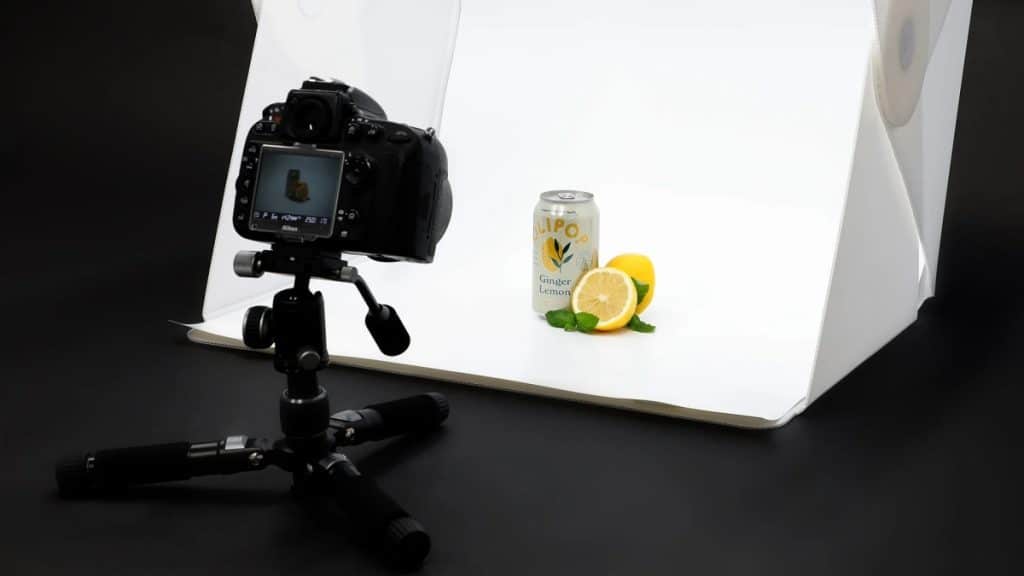
Lighting is a cornerstone of photography. Taming natural light will benefit your visual presentation, especially in lifestyle shots. However, product photography is usually performed in studio conditions, requiring artificial lighting equipment. Invest in softboxes or ring lights to provide even, diffused light. Positioning your lights correctly can eliminate harsh shadows and highlight the details of your product. Diffusers help soften the light. Reflectors bounce light onto the product, reducing shadows and highlighting key features. Lightboxes can be particularly useful for smaller items, providing an all-around light source and a consistent background.
Backgrounds and props make your main subject stand out. They provide depth and interest to your photos. Properly selected props add context and create an engaging scene that will captivate your consumers, letting them imagine your product as a part of their daily lives.
E-commerce image editing is pivotal to refining your pictures and ensuring they meet quality standards. Photo editing software allows you to adjust color balance, exposure, and contrast, bringing out the best in your photos. Background removal is commonly used to isolate the product and place it on a clean, consistent backdrop. Additionally, retouching can correct minor imperfections and enhance the overall appearance of your main subject. Subtlety is vital—focus on minor adjustments like color correction, exposure, and removing small imperfections. The goal is to enhance the product while keeping its natural look intact.
How to Set Up Product Photography
Start by selecting a location and adjusting the lighting. Striking shadows and excessive contrasts distort your subject’s vision and create an additional challenge during post-production. If using natural light, plan your photoshoot carefully to catch the soft, diffused light of golden hours; the midday sun should be avoided. Position your items near a big window. If you use artificial lighting equipment, position it at a 45-degree angle to your product to minimize shadows.
Ensure the camera has enough space to capture it from different angles. Do not settle for the standard front-facing shot. Try shooting from above, at eye level, or unique angles highlighting the product’s features. Changing perspectives can also reveal details that might be missed with a single angle. Looking from an unusual angle adds freshness and dynamism to your visuals. This approach will let you achieve eye-catching shots, impressing your consumers.
The items should be clean and free of dust or fingerprints. Use markers or guides to position each item in the same spot. This approach will give you a cohesive look when capturing multiple items for the same project.
Set a backdrop. Ensure it has no wrinkles or distracting elements. A white background is a popular choice. Use it for a professional look. However, playing with textures and colors can complement your subject and better represent its idea.
Pay attention to the details that can elevate your photos. Considering its shape and features, place your product in the center of the setup. Use props to add context or showcase the product, but ensure they do not overshadow the main subject.
Proper focus and depth of field make your main subject stand out. Use a shallow depth of field if you aim to blur the background, guiding the viewer’s eye to the product. This technique works well for items with sophisticated details. Experiment with macro shots to capture intricate features, textures, and functionalities. For larger products, ensure that the entire item is in sharp focus to provide a clear view.
Conclusion
By mastering the product photography essentials and implementing the recommendations and techniques mentioned in this guide, you can create professional, eye-catching photos that enhance your items’ appeal. High-quality visuals are key to succeeding in the electronic commerce world. Invest time perfecting your product photography setup, and you will see the impact on your sales and customer satisfaction.
