
Introduction
A visa application is incomplete without a proper visa photo, and failing to meet the required specifications can lead to rejection. Whether you are applying for a Qatar or Dubai visa, ensuring your photo aligns with the necessary guidelines is crucial. This guide will walk you through the Qatar & Dubai visa photo requirements and provide a step-by-step process to capture a flawless visa photo.
For complete details on visa photo guidelines, check out the official resources:
Why Are Visa Photos Important?
Visa photos are a critical component of the application process as they serve as an official identification method. Many visa rejections occur due to incorrect photos, leading to delays and added expenses. By following the proper guidelines, applicants can avoid unnecessary complications and ensure a smooth approval process.
A visa photo is not just an image; it plays a role in verifying your identity at multiple points of the application and travel process. Authorities use biometric recognition technology, and any deviation from the required specifications may lead to discrepancies, further complicating the visa approval process.
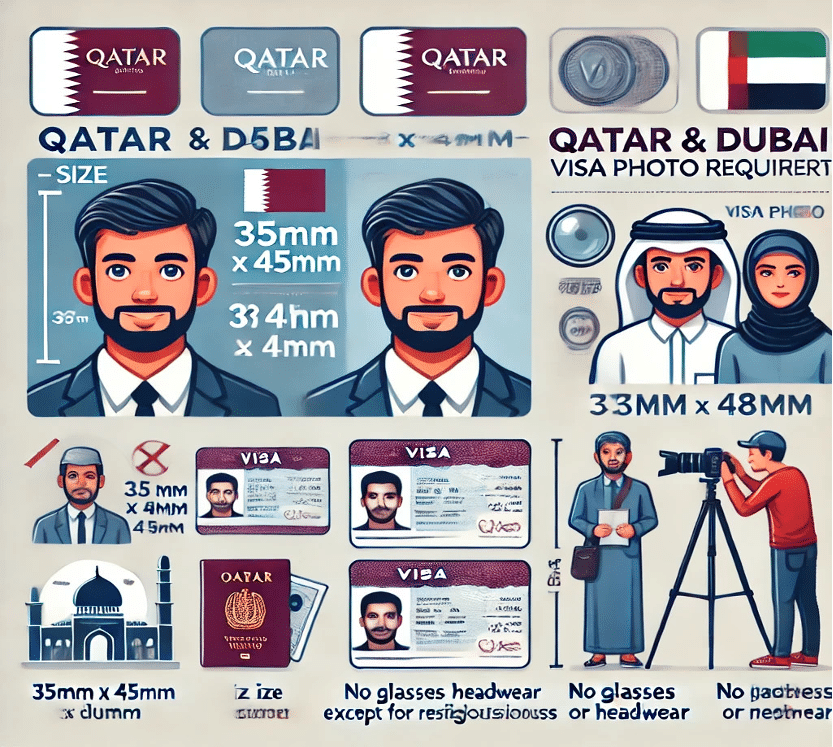
Qatar & Dubai Visa Photo Requirements
Before taking your visa photo, it is essential to understand the visa photo specifications for both Qatar and Dubai.
For a complete guide, check these resources:
- Qatar Visa Photo Guide
- Dubai Visa Photo Guide
General Photo Requirements:
- Size: 35mm x 45mm (for Dubai) and 38mm x 48mm (for Qatar)
- Background: Plain white or light-colored
- Facial Expression: Neutral with eyes open
- Head Position: Full face visible, centered, and looking straight at the camera
- Lighting: Even, with no shadows or glare
- Headwear: Only for religious purposes, ensuring the face remains fully visible
- Glasses: Not allowed unless for medical reasons (no reflections or tinted lenses)
- Resolution: High-quality, with no blurring or pixelation
- Clarity: No digital alterations, excessive filters, or over-editing
- Print Quality: High-resolution paper with no creases, stains, or marks
For the most updated guidelines, always check the official government websites before applying.
Special Requirements for Minors
If you are applying for a visa for a child, additional rules apply:
- The child must be alone in the photo—no hands, toys, or objects visible.
- The eyes must be open and clearly visible.
- Infants can be photographed lying on a white sheet or held upright with a plain background.
Common Reasons for Visa Photo Rejection
Understanding the most common reasons for visa photo rejection can help prevent mistakes. These include:
- Incorrect background color (should be plain white or off-white)
- Shadows on the face or background
- Smiling, frowning, or any facial expression other than neutral
- Poor image quality (pixelation or blurriness)
- Wearing glasses that cause reflections or obscure the eyes
- Incorrect sizing or cropping of the photo
- Improper lighting leading to overexposure or darkness
- Heavy makeup, accessories, or headgear (unless for religious purposes)
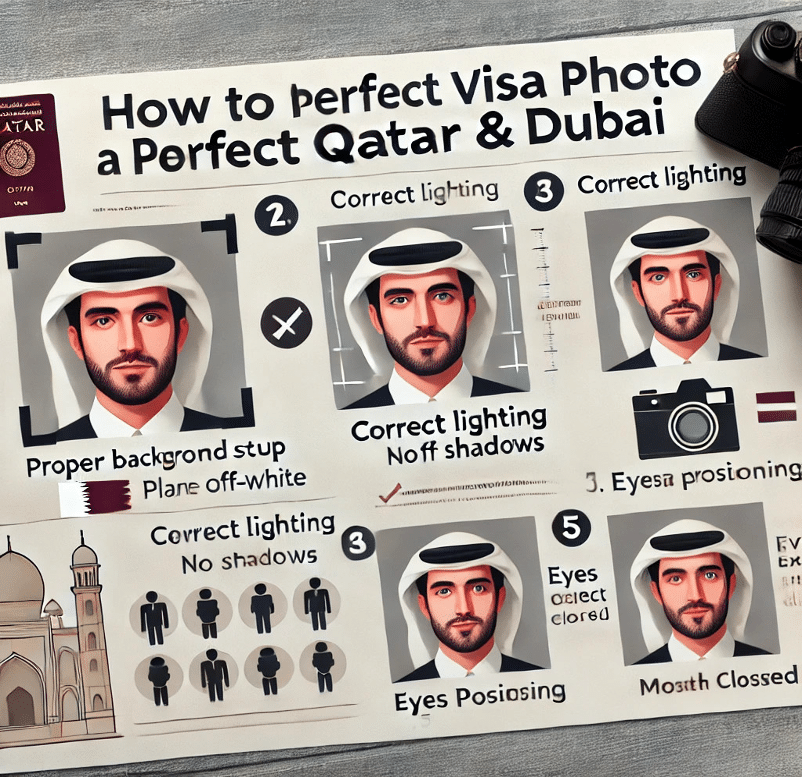
Step-by-Step Guide to Taking a Perfect Visa Photo
Step 1: What Background Should I Use?
The background should be plain white or off-white with no patterns or distractions. Use a white sheet or stand in front of a white wall.
Step 2: How Should I Position the Camera?
- Place the camera at eye level, about 1.5 meters (5 feet) away.
- The face should take up 70-80% of the frame.
- Ensure the shoulders and full head are visible.
Step 3: What Is the Best Lighting for a Visa Photo?
- Use natural daylight or bright, even lighting.
- Avoid shadows on the face or background.
- Do not use flash, as it can cause overexposure.
Step 4: What Facial Expression Should I Have?
- Keep your mouth closed and eyes open.
- Do not smile, frown, or raise eyebrows.
- Avoid excessive makeup or accessories that alter your appearance.
Step 5: What Should I Wear for a Visa Photo?
- Wear modest clothing without distracting patterns.
- Religious head coverings are allowed, but they must not obscure facial features.
- Avoid wearing glasses unless medically necessary.
Step 6: How Do I Take the Best Photo?
- Use a high-quality digital camera or a smartphone with at least 12 MP resolution.
- Hold the camera steady or use a tripod.
- Take multiple shots and select the best one.
Step 7: How Should I Edit and Resize the Photo?
- Crop the photo to match the required dimensions.
- Ensure the photo is in JPEG or PNG format.
- Do not over-edit or apply filters.
- Use online tools to adjust the size without distorting the image.
Step 8: How Can I Verify My Visa Photo?
- Check for clarity and sharpness.
- Ensure no shadows, reflections, or background distractions.
- Use official visa photo-checking tools if available.
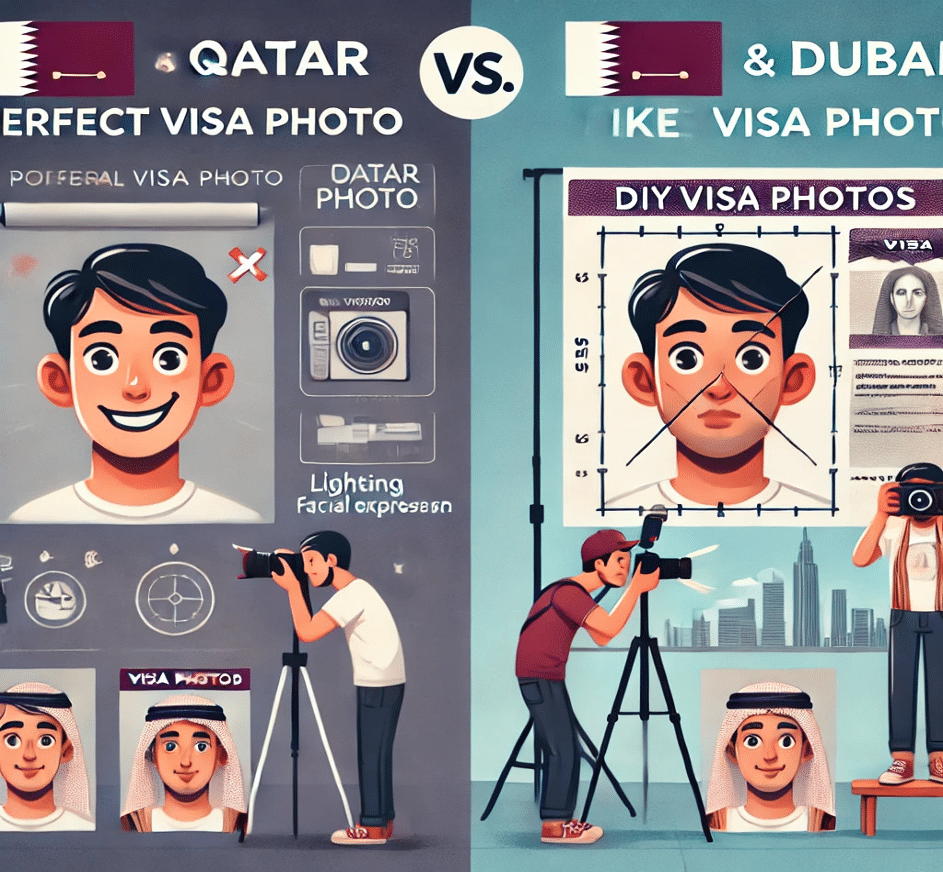
Professional vs. DIY Visa Photos
While you can take your visa photo at home, a professional service ensures that the image meets all the necessary standards. Consider the following:
For more visa photo options, check UK Visa Photo Requirements for additional guidance.
Pros of Taking a DIY Visa Photo:
- Cost-effective and convenient
- Allows multiple retakes
- Can be done from the comfort of your home
Cons of DIY Visa Photos:
- Risk of incorrect sizing or poor quality
- No guarantee of acceptance
- May require professional editing
Pros of Professional Visa Photos:
- High-quality images meeting all specifications
- Ensured compliance with Qatar & Dubai visa photo requirements
- Quick and hassle-free process
Where to Get Professional Visa Photos
If you prefer professional help, you can visit:
- Local photography studios that specialize in visa and passport photos.
- Online visa photo services that allow you to upload and adjust your image per country-specific requirements.
- Photo booths at airports and government offices, which often comply with visa photo standards.
FAQs About Qatar & Dubai Visa Photos
1. Can I take my visa photo at home?
Yes, as long as you meet the official Qatar & Dubai visa photo requirements, you can take a visa photo at home using a smartphone or digital camera.
2. Can I wear makeup in my visa photo?
Yes, but keep it minimal. Avoid excessive makeup that changes your natural facial features.
3. What happens if my visa photo does not meet the requirements?
Your application may be delayed or rejected. It is best to follow the official guidelines carefully.
4. Can I use my passport photo for a visa application?
Not necessarily. Visa photo requirements can differ from passport photo requirements, so always check the official guidelines.
Conclusion
Taking a perfect visa photo for Qatar & Dubai is simple if you follow the right steps. Ensuring compliance with size, lighting, and facial expression guidelines will increase the chances of your visa approval. Always double-check the latest Qatar & Dubai visa photo requirements before submitting your application. If unsure, opt for professional photo services to avoid rejection. Safe travels!
For more visa-related tips and updates, visit:
- Qatar Visa Photo Guide
- Dubai Visa Photo Guide