![8 Easy Methods to Recover Lost Files After Windows 11 Update [100% Working]](https://metapress.com/wp-content/uploads/2025/03/8-Easy-Methods-to-Recover-Lost-Files-After-Windows-11-Update-100-Working-1024x576.jpg "8 Easy Methods to Recover Lost Files After Windows 11 Update [100% Working]")
After I upgraded my computer to Windows 11, the Windows update deleted all my files. Is there any way I can get them back?
___A Question from Reddit
Users experience severe distress when their crucial files meet extinction following Windows 11 updates. But don’t panic, though. Most of these disappearances show false indicators and you can still recover lost files after Windows 11 update. This post includes explanations about the reasons behind file loss after Windows 11 updates in addition to specific retrieval methods based on different circumstances.
Part 1: Why Files Get Lost After a Windows 11 Update?
Sometimes, the files are lost after Windows update 11 and you’re unable to find them. This happens because of the following reasons:
- Temporary Account – You might be logged into a temporary account that’ll prevent you from accessing your files.
- Account Issues – Your usual account could be disabled or not working properly.
- File Location Changes – The update may have moved your files to a different folder.
- Accidental Deletion – Some files might have been deleted by mistake during the update.
- Hidden Files – Files could be hidden from view after the update.
Part 2: How to Recover Lost Files After Windows 11 Update?
Here are 8 options to recover missing files after upgrading to Windows 11. Try all until you find the one that works:
Option A: Use a Data Recovery Software
Many times, during an upgrade, files may not be deleted but can become hidden, corrupted or inaccessible. In such a case, a specialized data recovery software can scan the storage device to find these files, even if they don’t appear in the system.
Using advanced scanning, a tool like 4DDiG Data Recovery detects lost or erased files that haven’t been overwritten yet. Here’s how this tool can benefit you:
- This app can extract 2000+ file formats consisting of audio, images, documents, RAW files, videos, archives and so forth.
- It supports numerous internal/external storage e.g. hard disks, SD cards, USBs, SSDs, etc.
- It performs well in various data loss scenarios, including system upgrades, system crashes, virus attacks, and formatting.
- This tool provides free preview of extracted files by their path and name.
- It works with all major Windows versions, such as Windows 11.
Following are instructions to use this data retrieval tool to recover missing files after upgrading to Windows 11:
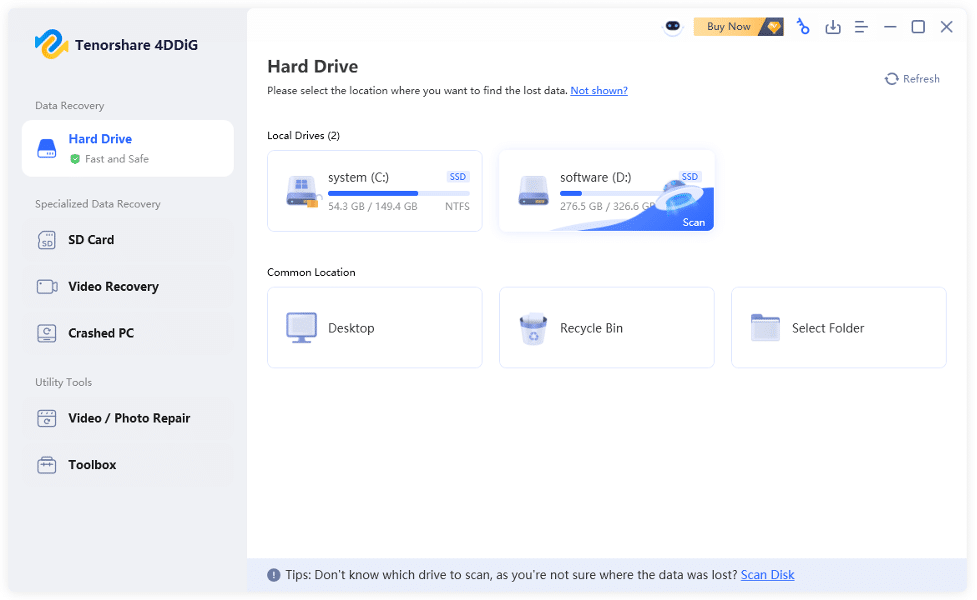
Step 1: Execute this data recovery tool on your computer. Then, choose the disk which you recently upgraded to Windows 11. Pick the file formats you wish to extract. Hit “Scan.”
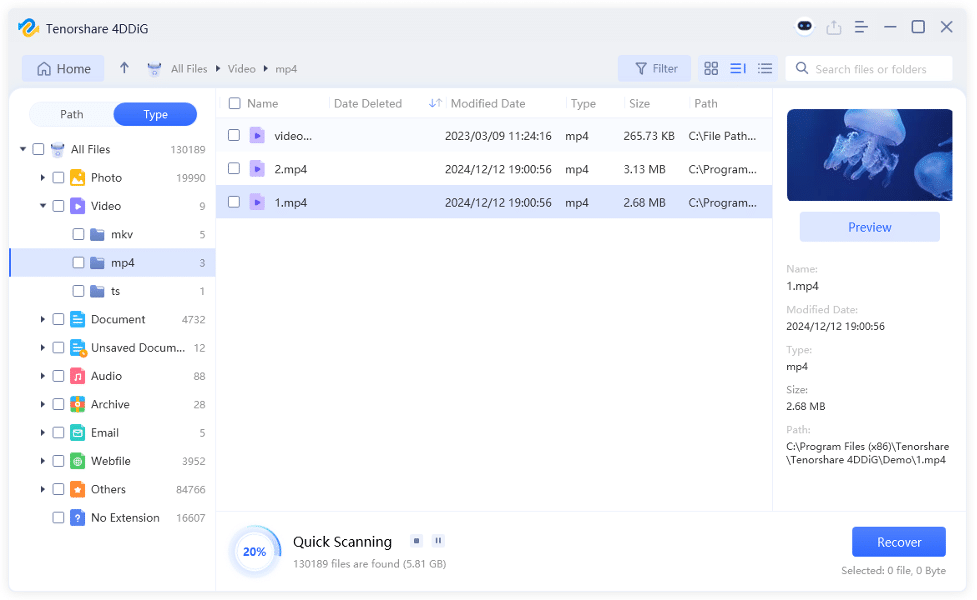
Step 2: After this tool finds and recover your missing files, stop scanning. Preview the extracted files.
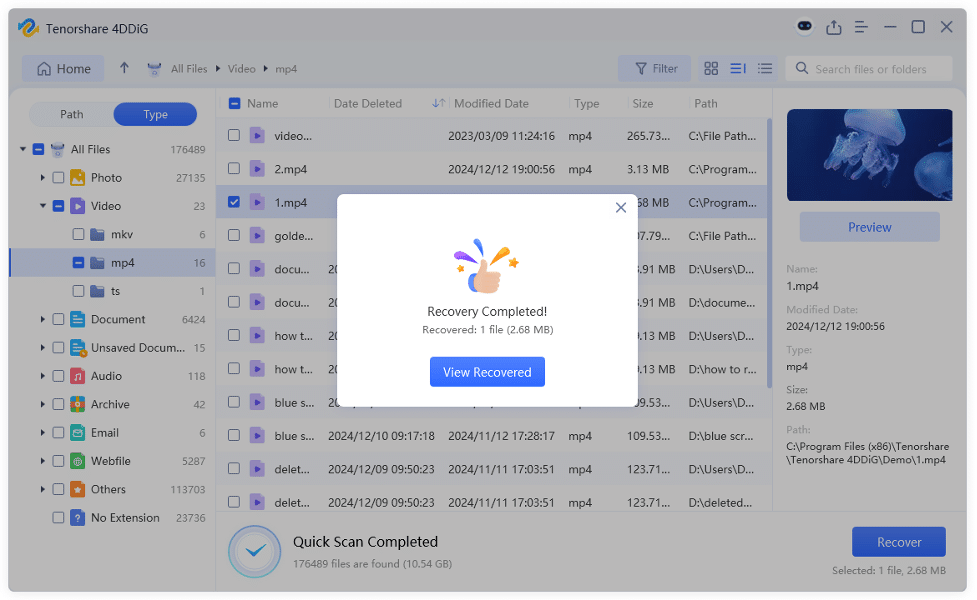
Step 3: Hit “Recover” if you’re satisfied with the tool’s results. Choose a destination e.g. a secure place on your computer or cloud drive to shift the extracted files.
Option B: Use the Search Bar
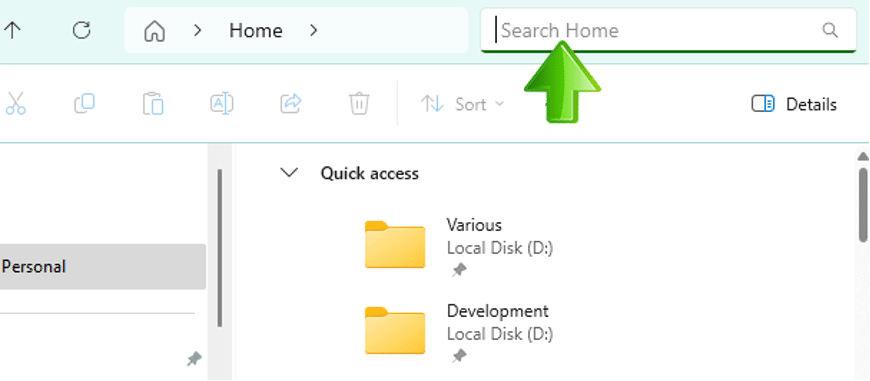
If your files are not missing from the system, you can use a Windows embedded tool like File Explorer to get them back. Simply, use the search bar in the top-right corner of File Explorer to look for and recover files after installing new Windows. To do so:
Step 1: Open File Explorer. Then, type the exact name of the missing file in the search field at the top-right corner.
Step 2; If you don’t remember the name but the file’s extension, type its extension in the search bar, e.g, *.docx. You’ll see all DOCX files present on your device. Locate your missing file among them.
Option C: Show Hidden Items
Sometimes, the update process can hide your files rather than erasing them. However, you can unhide them in the File Explorer to recover files lost after Windows update. Here’s how to do that:
Step 1: Open File Explorer. Tap “This PC.” Then, hit the “3-dots” icon in the above menu.
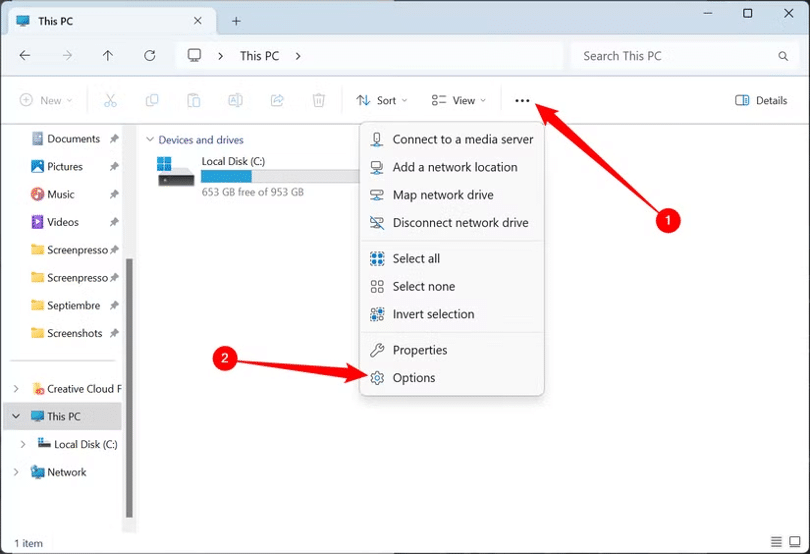
Step 2: Choose “Options.” Next, click “View.” Next, select “Hidden Files and Folders.”
Step 3: Then, tick mark “Show hidden files, folders and drives.” Hit “Apply.”
Option D: Restore from a Windows Backup
Still contemplating about “Windows update deleted all my files, how can I recover them? You can recover them using the “Backup and Restore” feature. But you must’ve turned it on before you lost the files. Here’s how to recover lost files after Windows 11 update with Windows backup:
Step 1: Type “con” in the Windows search field. Then, choose “Control Panel.” Open it.
Step 2: Next, pick “Backup and restore (Windows 7).” Afterward, choose “Restore my files.”
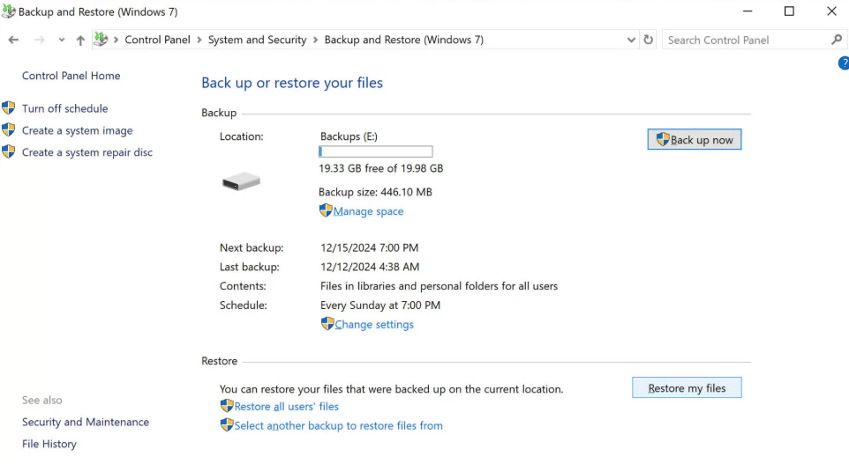
Step 3: Then, tap “Browse for files.” Select the files you wish to restore. Hit “Next.”
Step 4: Pick a destination to save the lost file. Then, hit “Restore.”
Option E: Remove the Temporary Account
When you can’t find your old files after upgrading to Windows 11 this could be because you’re using a temporary or old account. So, you’ll first need to check if you’re signed into a temporary account and if yes, remove it to recover files after installing new Windows. To do so:
Step 1: Right-click “Start.” Then, choose “Settings. Next, pick “Accounts.”
Step 2: Choose “Sync your settings.” If you see a message about a temporary profile, restart your PC and sign in again.
Step 3: Repeat “Step 1” and choose “Sync your settings” again. Then, turn on “Sync Settings” if they aren’t.
Step 4: Restart your PC. If you receive a “We can’t sign in to your account,” message log out and try again with your credentials.
Option F: Check the Recycle Bin
Your erased files may still be in the Recycle Bin after a Windows installation, especially if you didn’t empty it before upgrading. Also, since each drive has its own Recycle Bin, files from secondary drives (D:, E:) might still be recoverable even if Windows was installed on C:. So, examine the Recycle Bin on each drive to restore files lost after Windows update. Here’s how to do that:
Step 1: Open Recycle Bin. If you find your lost files there, right-click on each one.
Step 2: Then, hit “Restore” to put them back to their original place.

Option G: Employ File History
In case you’ve enabled the “File History” feature on Windows 11, you can use to get your missing files back. It’s a Windows embedded tool that creates a backup of your files every hour by default. However, you can also use File History to create a manual backup. Following are instructions to recover files after installing new Windows with File History:
Step 1: Type “restore files,” in the Windows search field. Then, open “Restore your files with File History.”
Step 2: Locate the folder that has your lost files. Select the files. Then, hit the green “Restore” button to return them to their original place.
Option H: Enable a Windows Administrator Account
While moving from an old version of Windows, if you created a new Microsoft account your files might still be in a deactivated administrator account. To recover missing files after upgrading to Windows 11 you’ll need to reactivate that account and sign in. To do so:
Step 1: Right-click “Start. Then, choose “Computer Management.” Open it.
Step 2: Head to “Local Users and Groups.” Then, pick “Users.” If the Administrator account has a downward arrow, it’s disabled.
Step 3: Double-click “Administrator.” Next, untick “Account is disabled.” Hit “Apply.” Sign out and log in with the Administrator account to access your files.
Final Words
If you were wondering before, “Windows update deleted all my files, how can I get them back,” this post answers your query. You can recover lost files after Windows 11 update by searching for them in the File Explorer, Recycle Bin or restoring them from a Windows Backup.
But if the files are missing from the system, a professional tool like 4DDiG Data Recovery serves as an excellent data retrieval solution. The program supports 2000+ file types and supports an abundance of internal/external storage systems and data loss scenarios.