
3D printing is instrumental in the designing and manufacturing stages of any engineering project. Not only for making objects look good in a presentation, but also for testing actual designs, validating concepts, and making parts that truly function under pressure. The right printer makes all that possible. So, as an engineering student, you require anything that won’t cost a fortune, but can still tackle a functional gear prototype. Today’s guide explores two Creality printers designed for engineering students, the SPARKX i7 for students just getting started, and the K2 Combo for those handling serious, advanced task work.
Why Engineering Students Need a Capable 3D Printer
Now, engineering programs and universities worldwide treat 3D printing as an essential skill, not an optional extra. This is because the ability to move from a digital design to a physical prototype in hours changes how students learn, iterate, and present their work.
Below is where 3D printing directly affects engineering student life:
- Prototyping functional components, brackets, gears, enclosures, housings, and structural models that can be examined and managed, not just viewed on screen
- Quick design iteration, print a model, assess it, find the flaw, adjust the file, print again. The whole cycle occurs in hours rather than weeks.
- Working with engineering-grade materials, ABS for heat tolerance, PETG for chemical resistance, and PLA-CF for strength-to-weight ratio in structural applications
- Physical project presentations, a functioning model on the desk, speak louder than any slide deck in a review or competition setting.
- Learning actual manufacturing workflows, G-code, slicing, material science, and tolerance planning are all expertise that carry straight into professional engineering roles.
Creality has been part of this shift from the beginning, selected for STEM education programs in multiple countries and partnering with institutions like Yale, Purdue University, and NUS to bring 3D printing into engineering curricula at scale.
What Should Engineering Students Look for in a 3D Printer?
Not every 3D printer is built for engineering usage. A tool that prints decorative items beautifully can completely break down when you ask it to create a functional ABS bracket or a carbon-fiber-reinforced structural part.
Here’s what engineering students should consider before investing in a printer:
Buying Criteria | Why It Matters for Engineering Students |
Filament Compatibility | Engineering materials require specific hardware support; a printer that handles ABS, PETG, PET, and PLA-CF without compromising output quality. |
Print Speed | Fast iteration keeps pace with project deadlines |
Build Volume | Full-scale parts print in one run, no splitting |
Smart Features | AI and automation save time on busy schedules, e.g., AI failure detection, remote monitoring, and auto calibration |
Ease of Use | Setup should never eat into project time |
Open Firmware | Grow into advanced tuning without switching machines |
Noise Level | Quiet printing fits any space, including shared ones |
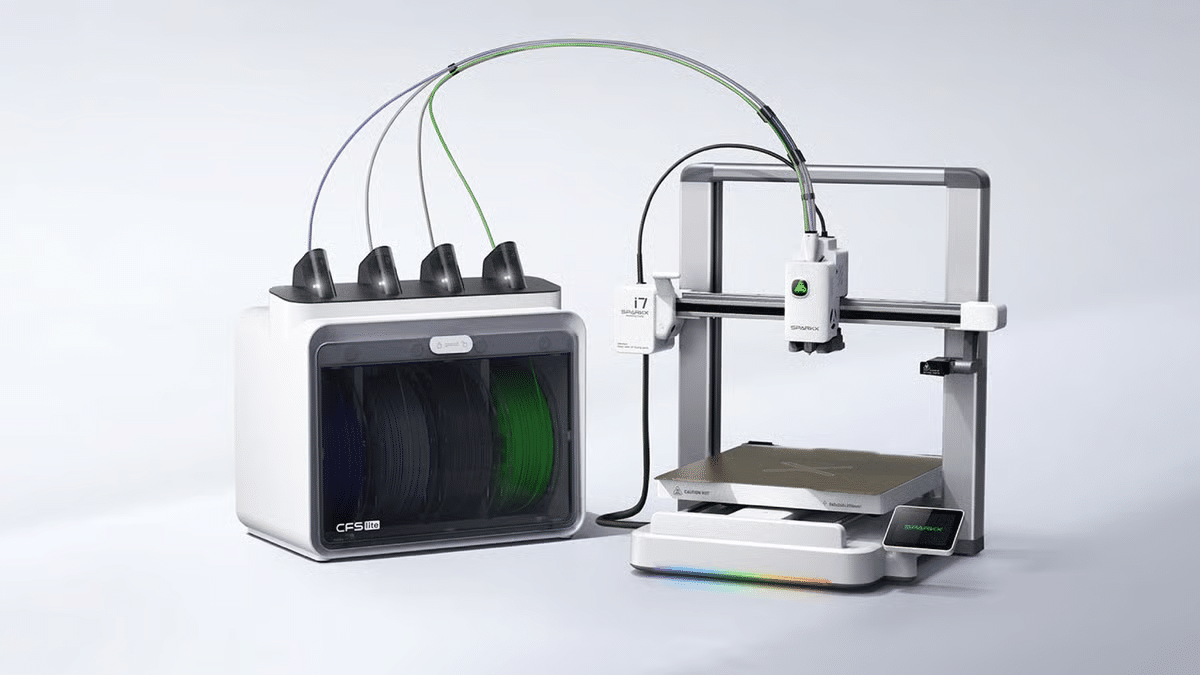
The Beginner Pick: Creality SPARKX i7
The SPARKX i7 is a good starting point for engineering students who are new to 3D printing, and it is not a compromise machine. It’s a truly capable printer that eliminates every barrier a newbie encounters, without limiting what you can do as your skills grow.
What Makes It Right for Engineering Beginners
CubeMe AI: Skip the CAD Learning Curve
Not every first-year engineering student is comfortable with CAD software yet. CubeMe shifts that equation completely. Snap a photo, tap once, and the AI changes it into a print-ready 3D model. It’s the quickest way to move from idea to actual thing, no modeling experience needed.
Magic Box: Multicolor from Day One
The Magic Box manages up to 4 colors in one print job automatically. It serves as a filament hub, color switcher, and moisture-resistant storage setup in one unit. For engineering students, that means color-coded assembly models, multi-material concept prototypes, and presentation pieces that excel without a complex setup.
Auto Bed Leveling + Nozzle Auto-Wiping
The i7 maps the build surface automatically and runs a two-stage nozzle cleansing cycle before each print. The initial layer happens properly every time, no manual leveling screws, no failed first layers, no wasted filament on calibration prints.
Open Klipper Firmware with Root Access
This Creality 3D printer operates with Klipper, with root access enabled by default. In other words, full compatibility with Creality Print, Fluidd, Orca and third-party tools. Begin with default profiles in year one. Tune, modify, and script in year three.
45 dB Night Mode
At 45 dB, the i7 runs quieter than most laptop fans. Print overnight in a dorm room or shared apartment, and no one notices.
Filament & Build Specs
- Filament support: PETG, PLA, TPU, covers the large majority of first and second-year engineering project needs.
- Build volume: 260 × 260 × 255 mm³, big enough for most standard task parts without splitting
Best Engineering Use Cases for the i7
- Concept models: fast, iterative design prototypes
- Presentation pieces: color-coded, multicolor models
- Assembly models: color-differentiated components that show how parts fit together
- First functional parts: brackets, housings, and enclosures in PLA or PETG for early-stage testing
The Advanced Pick: Creality K2 Combo
The K2 Combo belongs to a different class entirely. It is both a faster printer and a more efficient tool designed for engineering students who require professional-grade output, real engineering materials, and innovative automation that match complicated, demanding project work.

What Makes It Right for Advanced Engineering Work
Step-Servo Motor System: Precision at Every Speed
The K2 Combo operates three step-servo motors, one on the extruder, one on each of the X and Y axes. Step-servo motors combine the positional precision of stepper motors with live feedback correction. The outcome is continuous extrusion and accurate movement, even at the highest speeds.
600 mm/s Max Speed + 20,000 mm/s² Acceleration
Tight project deadlines are a consistent reality for engineering students. The step-servo setup of the printer drives print speed to 600 mm/s with acceleration reaching 20,000 mm/s². Additionally, the enclosed rigid body absorbs vibration at high speeds, maintaining details sharp and surfaces smooth.
16-Color CFS System: Professional Multicolor Output
The 4-bay CFS system assists up to 16 colors in a single print job. Auto filament identification removes physical configuration, loads the filament, and the setup identifies it. Smart auto-feeding and an automated magnetic cutter manage each transition without interruption. For final-year project presentations, multi-material assemblies, and color-coded engineering models, this is best.
Nozzle AI Camera: Real-Time Flow Rate Adjustment
The dedicated AI camera observes the nozzle during each print. It detects under-extrusion and over-extrusion live and automatically regulates the flow rate to compensate. No manual tuning mid-print. No broken layers from inconsistent flow. Moreover, the camera finds spaghetti failures and waste chute blockages.
Hardened Steel Nozzle + Drive Gears: Built for Abrasive Filaments
Carbon fiber-filled filaments (PLA-CF) are extremely harsh. Standard brass nozzles break quickly under that kind of friction, generating irregular extrusion and degraded output. The K2 Combo comes with a hardened steel nozzle and hardened steel drive gears as standard. Both manage abrasive filaments without wear, keeping a constant flow across long print runs.
Filament & Build Specs
- Filament support: PLA, PETG, PET, ABS, PLA-CF
- Build volume: 260 × 260 × 260 mm³ — cubic format handles tall, wide, and deep components equally
- Fully pre-assembled and pre-tuned
- Silent Mode: ~45 dB, as quiet as typing on a laptop
Best Engineering Use Cases for the K2 Combo
- Structural and load-bearing components
- High-detail multicolor assemblies
- Unattended overnight print runs
- Engineering-grade prototypes
- PLA-CF structural parts for weight-critical engineering projects
Side-by-Side: Key Specs at a Glance
The two printers come from the same Creality ecosystem. Both run open firmware with root access. Both work at around 45 dB. These are two tools built for two different stages of an engineering student’s journey.
Feature | SPARKX i7 | K2 Combo |
Best For | Beginner engineering students | Advanced project work |
Build Volume | 260 × 260 × 255 mm³ | 260 × 260 × 260 mm³ |
Max Speed | ≤ 500 mm/s | 600 mm/s |
Acceleration | ≤ 10000 mm/s² | 20,000 mm/s² |
Multicolor | 4 colors — Magic Box | 16 colors — 4-bay CFS |
Engineering Filaments | PLA, PETG, TPU | PLA, PETG, PET, ABS, PLA-CF |
AI Features | CubeMe, spaghetti detection, remote monitoring | Nozzle AI camera, flow optimization, failure detection |
Chamber Heating | No | Active chamber heating |
Silent Mode | 45 dB | ~45 dB |
Setup Time | Under 5 minutes | ~10 minutes |
Firmware | Klipper + root access | Creality OS + root access |
Conclusion
The SPARKX i7 is where most engineering students should begin, with quick setup, open firmware, AI tools, and zero learning curve. The K2 Combo is where serious project work starts, with 16-color output, engineering materials, and professional-level automation.
Same Creality ecosystem. Same software. Same community. Start with one, scale to the other when your projects demand it.