

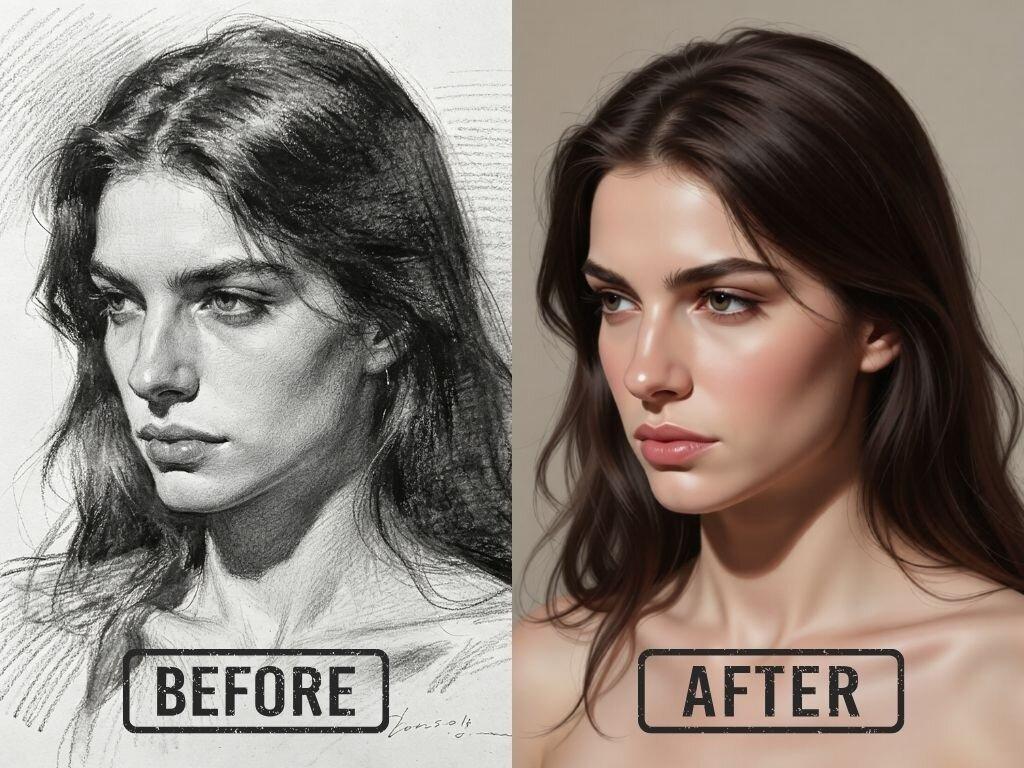
You likely have a phone full of photos that look a bit plain. Most people take basic snapshots that capture a moment but lack a creative spark. You can now use modern technology to turn those everyday shots into stunning works of art.
One of the easiest ways to start this process is by using a Free Image to Image Generator which allows you to upload a photo and tell the computer how to change it. This tool takes your original composition and applies new textures, colors, and artistic movements to it.
If you want more control over the final look, a professional AI photo editor can help you refine the details after the initial transformation is complete. These platforms use complex math to understand the shapes in your picture while letting you swap the style for something more exciting.
Step 1: Choose Your Base Image
The first step is picking the right photo to transform. You do not need a professional shot, but the quality of your base image does matter. AI works best when it can clearly see the subjects in your picture. If you upload a blurry or very dark photo, the computer might struggle to identify where a person ends and the background begins.
Try to find a photo with good lighting and a clear focal point. A portrait of a friend, a clear shot of your house, or a bright landscape works perfectly. You should also consider the composition. If the original photo is well balanced, the AI version will likely look much better. You can use almost any file format, but standard JPEG or PNG files are usually the safest bet for most online tools.
Step 2: Upload and Select Your Style
Once you have your photo ready, you need to bring it into the software. Most tools have a simple upload button or a place where you can drag and drop your file. After the image appears on your screen, you will see options for different styles. This is where the fun begins because you can choose from dozens of different artistic directions.
You might see options for oil painting, pencil sketches, or even futuristic neon styles. Some tools also let you type in a description of what you want. For example, you could type “make this look like a 1920s cartoon” or “turn this into a stained glass window”. The software will then analyze your photo and prepare to apply those specific visual traits to your image.
Step 3: Adjust the Transformation Strength
This is the most important part of the process. Most AI tools have a slider that controls how much the new style affects the original photo. If you set the slider to a low number, the result will look very similar to your original photo with just a few artistic touches. If you push the slider to the maximum, the AI might create something entirely new that only vaguely resembles your original shot.
Finding the middle ground is usually the best approach. You want people to recognize what is in the photo, but you also want the new style to be obvious. Play around with different levels to see how the shapes and colors change. You can always hit the generate button multiple times with different settings to see which one looks the most appealing to you.
Step 4: Refine with Prompts
If the style presets are not giving you exactly what you want, you can use text prompts to guide the AI. Prompts are simple descriptions that tell the computer what to focus on. You can add words like “vibrant colors”, “soft lighting”, or “highly detailed” to change the mood of the piece.
Think about the atmosphere you want to create. If you are turning a beach photo into a painting, you might want to add “golden hour” to get those warm sunset tones. If you are making a portrait look like a comic book, you could add “bold ink lines” to make the edges pop. The more specific you are with your words, the better the AI can match your vision.
Step 5: Generate and Save
After you have picked your style and adjusted your settings, it is time to let the AI do the heavy lifting. Click the generate button and wait a few seconds. The computer will process the pixels and show you a brand new version of your photo. You might be surprised at how much the image has changed.
If you like the result, you can download it immediately. If it is not quite right, do not worry. You can change the prompt, adjust the strength slider, or try a completely different style. Most people generate four or five versions before they find the one they love. Once you are happy, save the file in high resolution so you can share it on social media or even print it out.
Tips and Best Practices
To get the best results, you should keep a few things in mind. First, think about the contrast in your original photo. AI loves contrast because it helps the software define edges. If your photo is very flat and gray, the AI might get confused and create a messy result. You can use a basic editor to boost the contrast of your photo before you upload it to the AI tool.
Second, keep your prompts simple. You do not need to write a whole story. Just a few strong keywords are usually enough to get the point across. Using too many words can sometimes confuse the AI and lead to strange artifacts in the image. Stick to the main subject, the art style, and the lighting.
Third, consider the final use of the image. If you plan to print the photo on a large canvas, you need to make sure you are using a tool that supports high resolution exports. Some free tools might give you a small file that looks blurry when you blow it up. Always check the download settings to ensure you are getting the best quality possible.
| Style Name | Visual Result | Best Image Type |
|---|---|---|
| Cyberpunk | Neon lights and dark shadows | City streets |
| Watercolor | Soft colors and fluid shapes | Nature and flowers |
| Pixel Art | Retro video game look | Simple objects |
| Oil Painting | Thick textures and rich tones | Classic portraits |
| Line Art | Clean black and white lines | Architecture |
Common Mistakes to Avoid
One big mistake people make is using a photo that is too crowded. If there are twenty people in the background and lots of moving parts, the AI might struggle to apply the style evenly. It is much better to use photos with a clear subject and a relatively simple background. This allows the style to wrap around the subject in a way that looks natural and intentional.
Another mistake is setting the transformation strength too high on faces. Human brains are very good at spotting when a face looks slightly wrong. If you push the AI too hard, it might distort the eyes or mouth, making the person look a bit scary. If you are working with portraits, try to keep the strength at a moderate level so the person still looks like themselves.
Finally, do not forget to check the edges of your generated image. Sometimes AI can create weird shapes or extra limbs near the borders of the photo. This is common when the computer is trying to fill in gaps. You can usually fix this by slightly cropping the image after you download it. Always take a close look at the details before you decide the project is finished.
Conclusion
Turning your ordinary photos into unique pieces of art is easier than it has ever been. You do not need to be a professional painter or a computer expert to get great results. By using the right tools and following a few simple steps, you can create images that truly stand out.
Start by picking a clear photo and experimenting with different styles. Remember to play with the strength settings and use simple prompts to guide the AI. It might take a few tries to get exactly what you want, but the process is fun and the results are often amazing. You now have the power to turn your digital gallery into a collection of unique masterpieces.